

I made making a run and new coop for the chickens a priority at the moment because at the rate we are losing chickens we will have none soon. Also, they keep flying into the small garden area and uncovering the ground from the mulch. If you’ve been following us you know that we used the Back to Eden Gardening method for our first garden last year. Since we are in a very dry climate with little rain we decided to try that method and it worked great. Keeping the mulch over the soil is key to keeping the moisture locked below, softening the soil and composting the wood chips all at the same time. The chickens uncover the ground and it gets dry pretty quickly, defeating the whole purpose of having the mulch. Ive worked really hard on that garden and waited the entire winter for that soil to be softened for them to ruin it. Growing season is starting again and we plan on expanding the garden by 3x. We cannot afford losses…
First, we had to decide on where we wanted the run and coop to be. Then, we had to decide on whether we were going to build it ourselves or buy and assemble one, how big it needed to be and outweigh the costs and time it was going to take to put together or build. The cost was going to be about the same, a little more expensive buying something we’d just have to assemble versus building. Building something from scratch was going to take a lot of time that Ken does not have and I cannot do by myself (not yet). So we went with an assembly. We found a nifty shed we thought would be perfect! I liked the idea of resin plastic. It can be moved easy, its large enough, will last a long time, would be easy to clean and could be repurposed in the future if we ever decided to go another route. Got the posts and fencing and started working!
The run is 20×30, plenty of space for the amount of chickens we have. Thats 600 square feet! Squared up the area and started driving the posts in. That was Kens job since the posts were 6.5 feet long. I helped drive them down the last 6 inches though ;). 
The posts are 10 feet apart but we will be reinforcing with more posts later on. Its what we could afford at the moment. 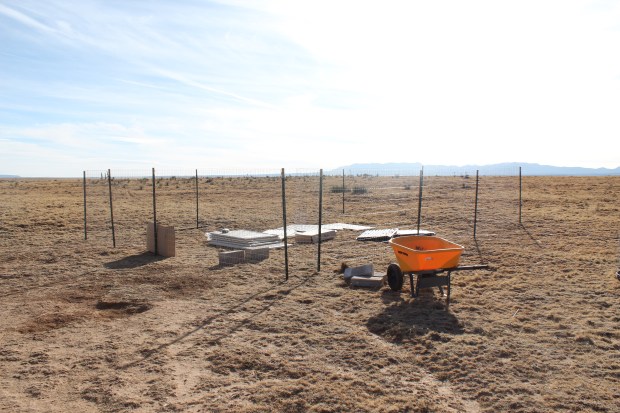
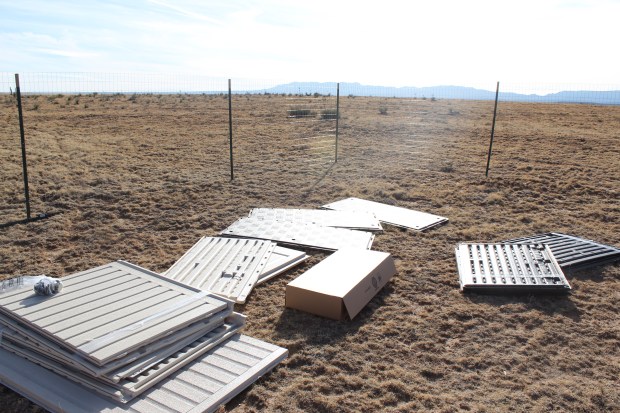
For now the door is just left over fencing we did not cut off. We will finish it off and come up with something later. At this point Ken opened the box of the shed and I started reading the instructions and organizing the pieces for quick assembly.
 We were only able to get the base, walls and back roof set up before it got too cold and dark. But, I finished it up the next day. With the help of my kids of course!
  I finished it and then had to make the decision of putting it up on blocks like we were originally planning to do, or do something different. I didn’t like the idea of having a “crawl” space underneath. We thought it would serve as a spot for the chickens to rest under from the sun or a preying hawk. But it could also harbor snakes. Ive seen snakes take up home underneath pretty much anything and everything here. We have a lot of snakes unfortunately. So I decided to not go through with that plan and instead used the wooden boxes our Solar Panels shipped in as a deck. The ground was too uneven to just leave this shed down. The front half of the roof slides back so it needed to be on level ground. Where we chose the run to be has a slight inclination. It was much easier to drag the boxes and lay them down than leveling this ground. Ill make sure to add rock or bricks around it so no snakes can dig and get under.
  I was really excited to see it put together. We chose this shed for the price and features! As I mentioned before the front half of the roof slides back without having to open the doors! For me thats a great use for a coop! We will be adding vents but this is not an air tight structure.
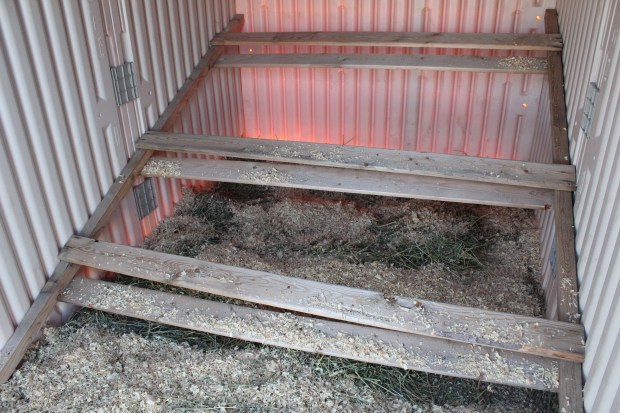
I went to our pile of pallet/shipping wood and grabbed a frame that was used to ship a door. I cut it to fit and pushed it in for a roost. This is temporary but I kind of like the way it turned out! I added some hay and pine shavings. Ill work on the nesting boxes and update. We will probably come up with something different later but for now this is a good set up. 
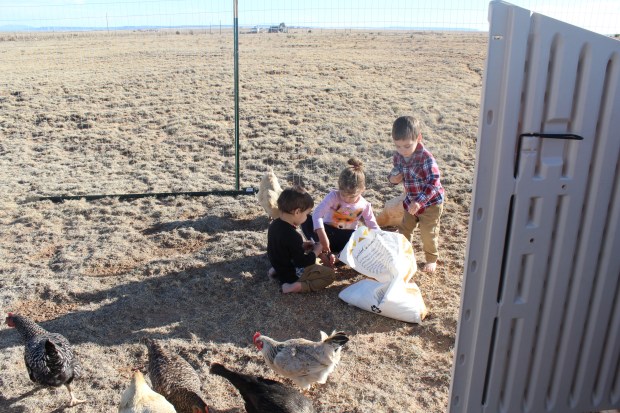
Then the fun began! Getting the chickens to come in the coop! I have a few chickens that are very feral so it was a challenge but we got it done! The kids are great helpers and they LOVE playing with the feed. What kind of mother would I be if I didn’t let them play with the feed? Plus, we really had to coax these chickens in! 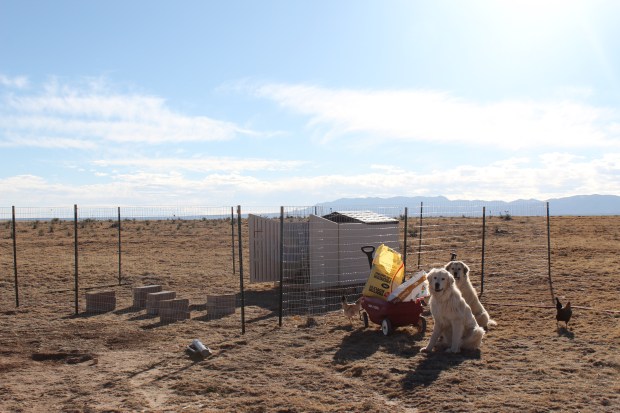 Aries and Achilles always looking out! 😊 Can you believe they are only 10 months old?!
 I really love the way the run and shed turned out. I have lots of ideas for things I want to add to their run. I plan on building an awning which is a much safer option in my opinion and I want to plant flowers all around the fencing. So many ideas!
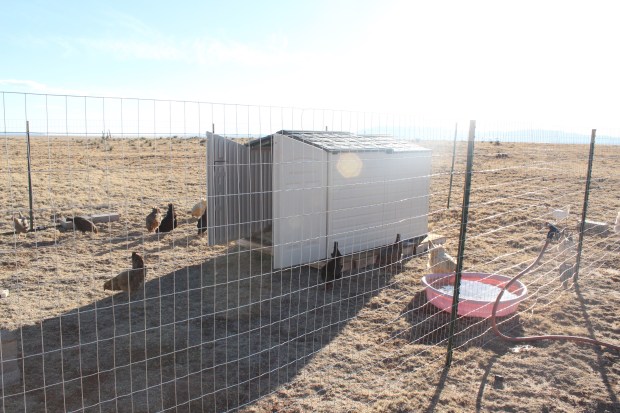
 Some chickens were not too happy! They just dont know that this is much safer for them. With Achilles and Aries on guard I do not see any coyotes getting in here or the coop! I love this shed as a coop!

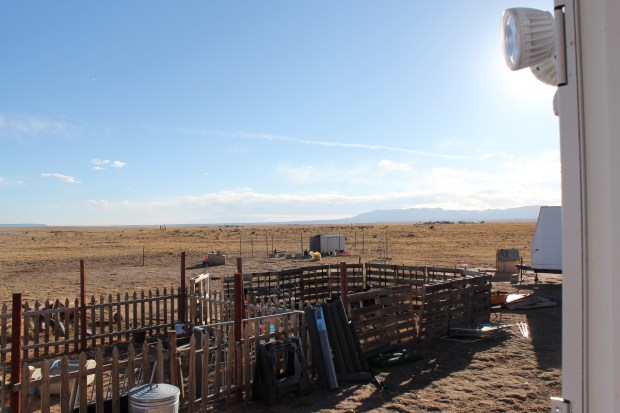 Im extremely happy with where we placed the coop. Here is the view from our front door. The next project is to remove all the pallet fencing and posts to make a 25×50 garden area! We will be using fine fencing to keep wild life out. I am so excited to start my first Spring garden! Its almost Spring and that means we have a ton of new work to do. We’ve already tackled one thing on our list! I feel so relived finally! No more losing chickens and lets hope that this shed works out as we envisioned it!
Until next time! Happy Homesteading!
-Cristina
